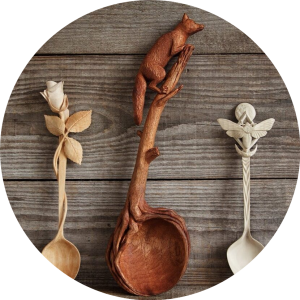
If you're a beginner woodcarver, you might not be sure where to begin. These are some tips for starting your first animal carving project.
Dog
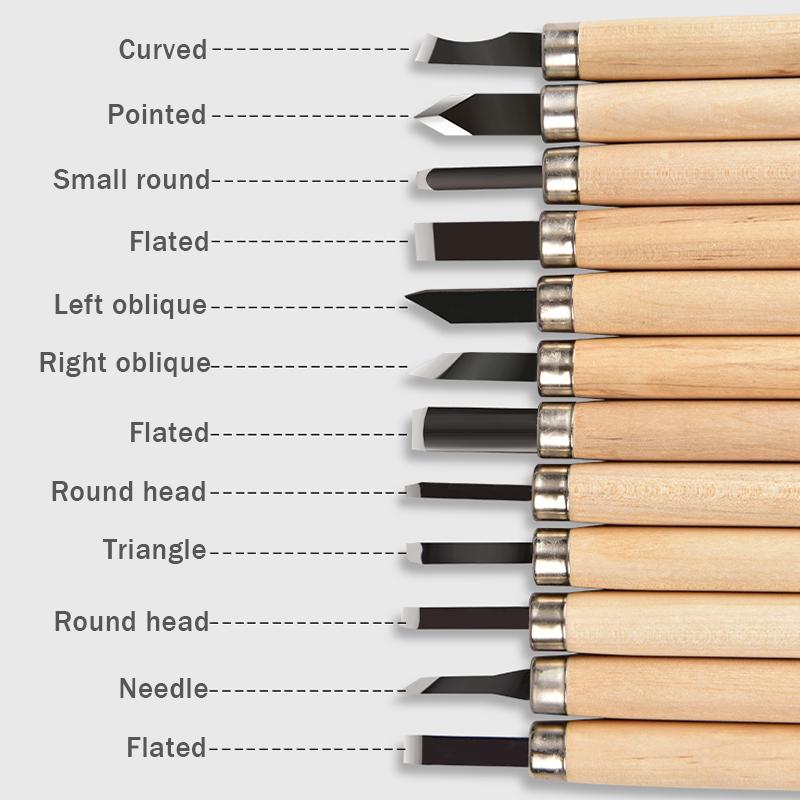
A lot of free woodcarving patterns are available online for aspiring woodcarvers. These patterns can help you carve your dog in many different styles and sizes. Here are some tools that will be needed to carve your dog. A band saw or copingsaw, chisels and a mallet are all you will need. You also need some time to sharpen them. Then, you'll be ready to begin carving!
Eagle
The bald eagle is a traditional symbol of strength, courage, and wisdom to Native Americans. Its main function was to act as the creator’s messenger. It measured approximately 20 inches across and 5 in inches wide. The eagle has become a very popular choice for wood carvings. There are many options for carving eagles from antique to modern woods. This article will discuss some of the most well-known wood carving styles.
Bear
Carving a bear in wood is an easy project. It has several distinguishing lines and shapes. Each line is heavier than the previous. The front paws of a bear are angled opposite the leg lines for added visual interest. You might consider buying a book that will teach you how to make a bear. James Miller's book provides a detailed explanation of the process.
Elephant
A stunning way to add personality to your home is to carve an elephant wood carving. 1stDibs stocks 56 antique carved wood elephants as a well as two new pieces. These pieces were made as early as the 19th-century and have grown in popularity over recent years. You can choose between Art Deco, Mid-Century Modern and Folk Art styles. A smaller piece can be added to your home to add a subtle accent.
Moose
A moose is a great wood carving animal to try, whether you want to add antlers or just create a beautiful moose head. Dowels can hold moose antlers or paddles. You'll need to push them in and possibly glue them in place. After that, you can paint the moose with a walnut gel stain or use paint to color the moose.
Template for the Moose
A moose carving templates helps carvers to create realistic-looking carvings. You can use paints to color your moose carvings. After learning the basics of carving this animal, it's not difficult. For the final touch, add details like fur and eyes with a brush or a typhoon bit on a die grinder. The Moose Template is ideal for beginners who are interested in carving an animal.
Bear template
To begin a bearwood carving, you will need to create a template. Next, you will need a Dremel tool for exploring the wood features. Stop cuts can be made to separate the legs and the lower body using this tool. To indicate where the legs will split, you could also make small V-cuts. Once you are done with the leg and ear sections, you can finish the underbelly. You should leave enough space in the back for the bear to be shaped.
Eagle template
Three detailed templates are needed to carve an adult eagle. One template will be used to carve the eagle. The other template will be used for working on paper and can then be cut to make patterns. As a reference, you can use the third template. Next, use the tools to cut the main lines of your template. Be sure to cut the lines as close as possible with the pattern line. Make sure that you align all of your marks.
Template for the mouse
There are many designs available for wood carving beginners. This will make your job easier. If you're just starting out, you could start with a simple geometric pattern. Then you can move onto more complicated patterns as you progress. Once you master the basics of mouse design, you'll be well on your way to designing the perfect mouse.
FAQ
What is the main difference between plywood or particle board?
Plywood consists of layers made from wood and pressed together by pressure. Plywood is available in a variety of thicknesses. It is often used to make cabinets or flooring. Particle board consists of sawdust mixed and resin. The resin is then compressed into large blocks. It's often used for home renovation projects. Both types of boards can be easily cut and are durable.
How much does a hobbyist need to invest in getting started?
A lot of capital is required to purchase the necessary supplies and tools if you want to start your own woodworking shop. You can start by purchasing a small table saw and drill press as well as a circular saw, circular saw, jigsaw and sanding machines. These items aren’t too expensive so you won’t have to break the bank.
Where can you find free woodworking blueprints?
Woodworking plans can be found online without the need to purchase books or magazines. You just need to search Google. Enter "free woodworking", and you will see hundreds upon hundreds of websites offering free plans.
What type of tools does a carpenter use?
A hammer is probably the most widely used tool for carpenters. A hammer helps to carpenter pound nails into the wood. A hammer is used to hold pieces together during a project. Other tools include clamps.
How long does it take to finish a piece of furniture?
It depends on the size and condition of the furniture. Smaller projects like boxes and picture frames can be finished within one day. Larger projects, like desks or dining tables require several days. It takes time to properly stain and seal wood.
Do you have the skills to learn woodworking?
The best way to learn anything is by doing. Woodworking requires patience, practice and skill. To master any craft, it takes time.
It is the best way to learn to do something is to actually do it. Start small and learn from your mistakes.
How can a beginner woodworker make money?
Many people are looking to create their own furniture and start an internet business. If you are just starting to build furniture, there are many other ways to make money than selling on Etsy. You could sell at craft fairs or local events. Or you could offer workshops for others who want to learn how to build their own furniture. You might be able to offer services like remodeling homes or making custom pieces for clients if you are a skilled carpenter.
Statistics
- The U.S. Bureau of Labor Statistics (BLS) estimates that the number of jobs for woodworkers will decline by 4% between 2019 and 2029. (indeed.com)
- In 2014, there were just over 237,000 jobs for all woodworkers, with other wood product manufacturing employing 23 percent; wood kitchen cabinets and countertop manufacturing employing 21 percent. (theartcareerproject.com)
- Overall employment of woodworkers is projected to grow 8 percent from 2020 to 2030, about as fast as the average for all occupations. (bls.gov)
- If your lumber isn't as dry as you would like when you purchase it (over 22% in Glen Huey's opinion…probably over 10-15% in my opinion), then it's a good idea to let it acclimate to your workshop for a couple of weeks. (woodandshop.com)
External Links
How To
How to drive a nails in wood
It is essential to pick the right size and style of hammer before you can drive a nail in wood. The most commonly used types of Hammers are claw hammers. Each type of hammer comes with its advantages and disadvantages. For example, a claw hammer works best when you want to hit something hard, like nails; however, it's difficult to control precisely where the blow lands. A sledgehammer allows you to hit large areas simultaneously, but it is too heavy and cumbersome to use for small tasks.
Once you have chosen the right hammer for you, put your hand flat against its side so that it rests comfortably in the palm of your hand. Grab the handle tightly, but do not squeeze too hard. You should hold the hammer straight-up, with your wrist still relaxed. You should then swing the hammer straight up, keeping your wrist relaxed. You should feel the impact of the hammer striking the nail. Practice swinging your hammer on a block of wooden until you feel comfortable.
You can now drive the nail by holding the hammer to your body. Position the nail, so it's perpendicular to the surface of the wood. Your eyes should be focused on the nail's tip. Swing the hammer forward, and then move the hammerhead. This can be repeated several times to increase the speed of your swing. After mastering the technique, you can add power to your swings. Hold the hammer high above your shoulders and pull it down. This will allow you to exert more energy.
After you have nailed the hole, take the hammer off the nail. To remove the remainder of the nails, you can use a screwdriver/pry bar. Keep the nails heads in line with the surface of the board to prevent splitting the wood.