Chattahoochee Woodturners helped Eagle Ranch by building a woodturning space on its campus. The American Association of Woodturners granted an Educational Opportunity Grant to the woodturners, along with other donations. To get the project started, local woodturners donated equipment and tools. All students are welcome to use the woodturning studio, and adults with disabilities can also use the woodshop.
Hark Woodturner
Hark first started woodturning at Harvard University's Mather Building eight years ago. He was approached by Hark after a class. Hark said yes to the offer and agreed to teach the class at Harvard. After several unsuccessful attempts to teach the course in Harvard, Hark eventually found an old lathe from a basement of a neighboring house. That spring, his first Harvard class started. Students from all Harvard Houses are invited to the woodturning workshop's classes today. He also continues teaching woodturning on weekends.
Arthur and Pamela also teach classes and travel to trade shows and woodworking symposiums to find new audiences for their work. They have hosted many world-renowned artists as guests and have met many others. Woodturning workshops featured many artists from all walks of life. The studio has also sent a Commander and Knight to the Norwegian Woodturning Cruise which is held every three-years.
Tools
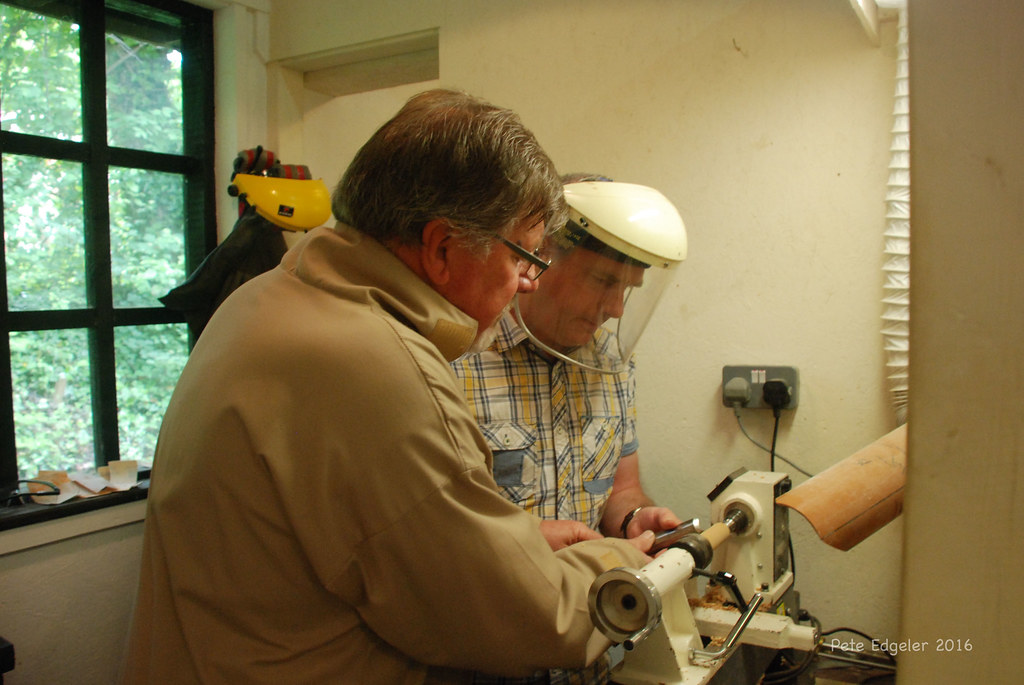
One of the most important items to have in your woodturning studio is safety gear. To keep the glare from sand on your face, you might want to purchase safety glasses, eye protection, or a visor. To maintain your tools in top condition, sharpening gear can be purchased. You'll also want safety gear.
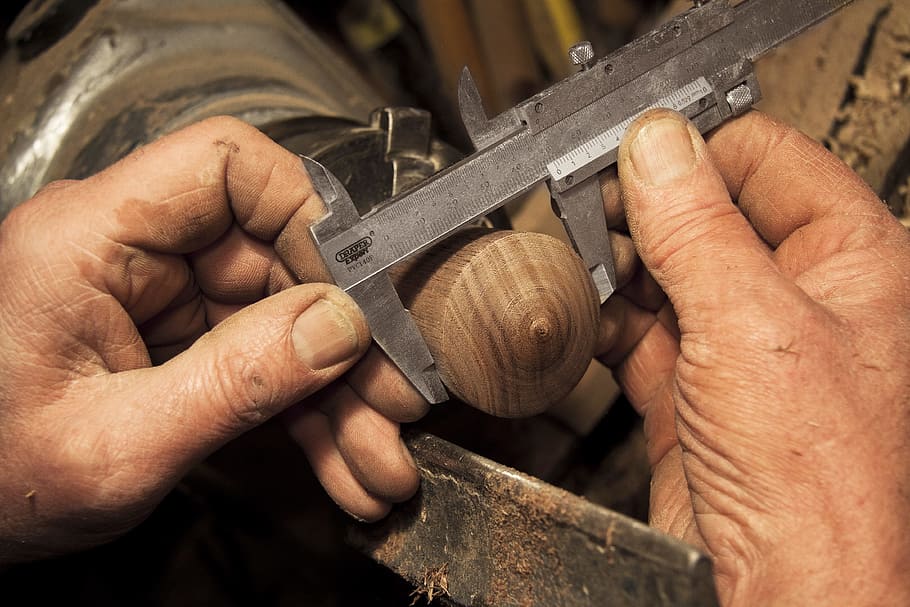
You will require a drill, a screwdriver, or a banjo as your most basic tools. The banjo is used to move your turning tool along a lathe's bed. It also supports the toolrest. This allows you hold your turning tool in the most convenient place. While the banjo can be adjusted, most modern lathes feature a locking mechanism. You'll need these tools to create your unique creations.
Techniques
No matter whether you're interested in hobby woodturning or are a professional, it is essential to learn the best tools and techniques for woodturning. These tools are crucial for creating functional and beautiful pieces that will be both functional and attractive. These tools can be purchased online, or in a local woodworking workshop. The process of turning wood is time-consuming, but the results are well worth the effort.
A woodturning class can be a great way for beginners to get started. A workshop will cover everything you need to know, including safety gear and choosing the right tools. You will also have hands-on experience with a lathe. The course will teach you how to properly use tools and allow you to try out different techniques. Depending on the skills you already possess, your projects can range from carving mallets to making bottle stoppers and bowls.
Class size
A beginner's workshop at Durham's woodturning studio is the perfect place for those who are just starting out in woodturning. You will learn basic techniques and tools. The class will also include several projects. Safety will be stressed by the instructor. Bring a face mask or other protective equipment.
It will allow you to put your focus on each student and their learning. Instructors will have plenty to respond to questions and provide individual attention. Often, there will be no more than six students in a class, so you can expect to learn at a comfortable pace. Most classes are project-based, and will last several days. Private lessons can focus more on advanced techniques for those who are more skilled.
Cost
It is a costly venture to open your own woodturning shop. The cost of supplies and equipment can easily reach several thousand dollars. A good way to save on these expenses is to sell your finished products for a reasonable price. Selling your finished products can double, or even triple your profit. While high-end pieces are a great way to promote your art and generate profits, you may also want to sell items at a lower price point. While high-end items may take longer to produce, you can always sell simple items in this price range. In fact, they can sell out within the first day of a two-day art show.
A class will give you the foundations of woodturning. This will include the safe use of tools and proper sharpening. Then you can move on to more challenging projects and learn advanced tools and techniques. An introductory woodturning class usually costs $75 for Mather residents, and $75 for Harvard affiliates. All materials are included in this price. Additionally, you will receive a list with nearby hotels.
FAQ
How often do I need to buy new supplies
You may have to replace certain tools. If you're using hand tools, you'll need to sharpen them regularly. You'll also need to replace parts if you use power tools. Avoid buying too many products at once. Spread your purchases out over several months.
How do I organize my shop?
A designated place to store your tools is the first step towards keeping your workshop clean. You want your tools to stay clean and free from debris and dust. You can hang tools and accessories with pegboard hooks.
Where can I purchase woodworking supplies
There are many places that you can find all the information you need. You can visit your local hardware stores, or you can look online at sites like Amazon.com.
For furniture and other materials that you can reuse, check out flea markets and garage sales.
Where can I find free woodworking plans?
For free woodworking blueprints, you don’t need to read any magazines or buy any books. You just need to search Google. You can search Google for "free woodworking" and hundreds of websites will appear allowing you to download plans.
Do I need to be a genius to succeed in woodworking?
No. Woodworking is not rocket science. It is possible to learn basic tools and techniques that will allow you to create beautiful art.
Statistics
- Average lumber prices rose about 600 percent between April 2020 and May 2021. (familyhandyman.com)
- The best-paid 10 percent make $76,000, while the lowest-paid 10 percent make $34,000. (zippia.com)
- If your lumber isn't as dry as you would like when you purchase it (over 22% in Glen Huey's opinion…probably over 10-15% in my opinion), then it's a good idea to let it acclimate to your workshop for a couple of weeks. (woodandshop.com)
- Woodworkers on the lower end of that spectrum, the bottom 10% to be exact, make roughly $24,000 a year, while the top 10% makes $108,000. (zippia.com)
External Links
How To
How to stain wooden surfaces
Staining wood is the process of applying chemicals to the wood's exterior, which alters its color. This chemical reaction causes the wood to change from white to brownish red. Oak is the most common wood type for staining. However, you can also use other wood types.
There are several ways to apply stains to wood surfaces. Mixing the stain in a solvent such as turpentine and spraying it onto the wood is one method. Another method involves applying a solution of water to the wood. It is possible to mix stain into varnishes and paints, making it part of the finishing coat.
Preparing the surface for staining wood is the first step. To apply the stain, clean the wood completely. Sanding the wood smooths out rough spots and scratches. Then you must decide what kind of stain you want to use. There are two basic kinds of stains: penetrating stains and non-penetrating stains. Penetrating stain penetrates deeper into wood than nonpenetrating, making them suitable for dark colors like mahogany. Light colors such as maple work well with non-penetrating stain.
Once you have decided on the stain type that you want, get your tools ready. A paintbrush works well for applying stains because it allows you to spread the liquid evenly across the surface. After you're done painting, make sure to have some rags handy to remove any excess stain. You should have enough containers to store the various components of the stain mixture if you intend to mix it yourself.
After you have prepared your materials for staining, clean the area. Clean the area with soap and warm water to get rid of dirt and grime. Wipe the entire piece of furniture with a rag dampened with clean water. Make sure you eliminate any loose debris, especially if you plan to stain darker wood.
Apply the stain. Start at one end of the piece of furniture and brush or spray the stain onto the wood. You should work slowly and carefully. Continue moving along the grain until you reach your opposite end. Make sure that the stain does not drip off the edge of the wood. Allow the stain to dry completely before you move on to the next step.
A coat of clear polyurethane sealing agent is applied to protect the paint. Apply three coats polyurethane sealer. Let the third coat dry overnight before you sand the final coat.