This article will describe the methods involved in woodturning an inlay. We'll also discuss the materials used and how to maintain them. This article will show you how to make an inlay and mortise using a handpiece for a Rotary-tool. You can read on for more details. Then, try it yourself! You'll probably enjoy this easy and rewarding project. Inlay is a must for any woodturning project!
Techniques
Inlay techniques may be an essential part of any woodworking project. They can add character and beauty to the finished product, as well as enhance its aesthetic appeal. There are many options for creating beautiful inlays. Each has its own benefits. This article will show you the many options. Learn more. Preparing the wood will be your first task. Clean it thoroughly with a damp rag or paper towel. To remove any dirt or other residue, you may need to use mild dish soap. Use chemicals with care as they can cause damage to the wood. You might also consider hand tools for removing wood.
Inlay techniques can be applied to other materials. You can use inlay techniques to other materials, such as stone, metal and wood. When applied properly, inlaid pieces can add a beautiful contrast image to the piece. There are many types of inlay tools, such as knives, jigs and fixtures that hold the inlayed pieces in their place. You can inlay the wood before or after it is turned. After turning the piece of wood, you can add inlay items to the top or the bottom.
Materials
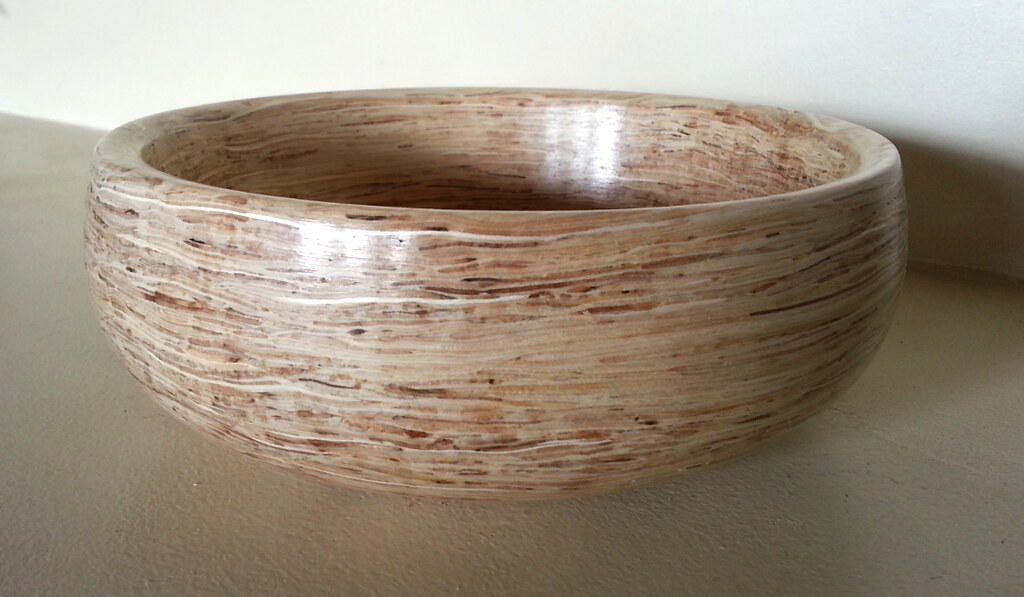
Using a wide variety of inlay materials to cover the surface of your finished object will give your piece more visual appeal. Inlay materials can cover many types recesses such as those made by the lathe or natural cracks. Inlay materials can be used to cover brad nails or screw heads in some cases. Follow these steps for creating beautiful inlays.
First, choose a material. Some materials are better than others for this purpose. Because it doesn't require any cutting or sanding, resin inlay can be easier for some people. Additionally, resin is available in many colors, which can be magical at times. These are some helpful tips for using resin as an inlay.
Installation
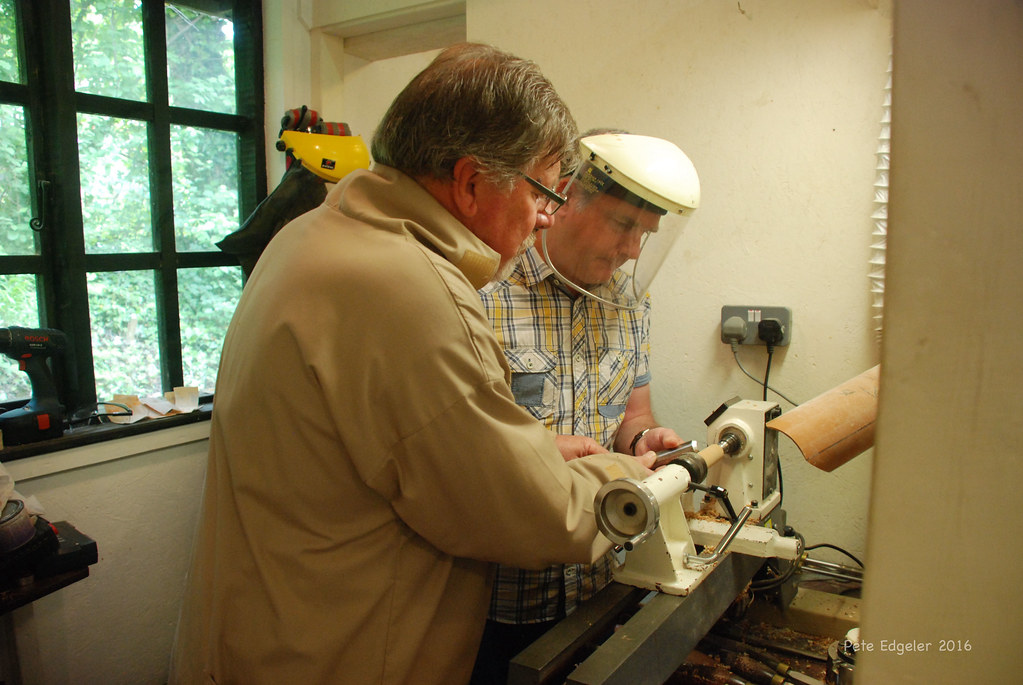
Inlaywork is a decorative method that can be added to woodturning objects. Ron Hampton gives detailed instructions on how to make woodturning inlays. He shows the process of installing inlays on bowls, tops, and bottoms. He discusses safety guidelines as well as the importance of precision during the process. This technique adds a unique touch to the wood turnings. Inlay bandings are available from various suppliers, such as Woodcraft.
Preparing the base of the wood for woodturning inlay is essential. Use a plunge router for best results. Attach the template guide to your router's base. The bushing should be pressed in the correct position around the guide collar. Once the inlay has been placed, ensure that the base remains flat. Installing the inlay with its angled edges will be much easier. The inlay will be more easy to install if the router has a bit that is slightly larger that the mortise.
Maintenance
A few easy steps are required to care for your woodturning-inlay. You must clean your inlay before you put it in your woodturning project. This is especially important when using CA glue for stone inlay, as the fumes can be hazardous. You can also use a 3/16 inch allen wrench to determine the depth of your inlay if you have very limited space. To avoid scratching your inlay, sand it down to 120 grit.
FAQ
What is the average time it takes to finish furniture?
It all depends upon the size of your piece of furniture. You can finish smaller projects, such as boxes or picture frames, in one day. Larger projects like dining tables and desks require several days. It takes time to stain and seal the wood properly.
How can I learn basic woodworking skills
You can start building furniture by making a bench. This project can easily be done using whatever wood you have at your house. You don't need to know which type of wood you should use. Instead, get some pine boards at Lowes or Home Depot. After you've built your bench, you'll want to sand off all the rough edges and finish it with a stain or varnish.
What kind of wood should you use?
The most popular types of wood used in woodworking include oak, pine, birch, maple, cherry, mahogany, teak, poplar, redwood, and bamboo. Each type of wood has its own unique characteristics that can affect the final product's appearance. Oak, for example, tends be darker and more hard than other woods. Birch is soft and light, and mahogany is denseer and heavier. You can also choose between solid wood and veneers. Veneers are thin sheets of wood that are glued together to form a single layer.
Statistics
- The best-paid 10 percent make $76,000, while the lowest-paid 10 percent make $34,000. (zippia.com)
- Average lumber prices rose about 600 percent between April 2020 and May 2021. (familyhandyman.com)
- The U.S. Bureau of Labor Statistics (BLS) estimates that the number of jobs for woodworkers will decline by 4% between 2019 and 2029. (indeed.com)
- Overall employment of woodworkers is projected to grow 8 percent from 2020 to 2030, about as fast as the average for all occupations. (bls.gov)
External Links
How To
How do you measure wood accurately?
We have several ways to measure wood. We use a digital ruler (a tool to measure distances), laser level (used for leveling your work surface), and bubble level (used for levelling your work surface).
A digital caliper can have two jaws, which open and close. One jaw holds the object being measured and the other measures the distance between them. The digital caliper is great for measuring small distances like thicknesses of wood.
Laser levels emit an infrared laser beam that projects a straight line across the floor. The laser emits a red dot on the line. You can check if the surface is level by looking down at the line. For large surfaces, laser levels are the best way to check their accuracy.
Bubble levels look similar to a compass. The center of the device contains a bubble. As long as the bubble remains centered, the device can tell you if the surface has been leveled. Bubble levels are great for checking the accuracy and precision of smaller areas.