
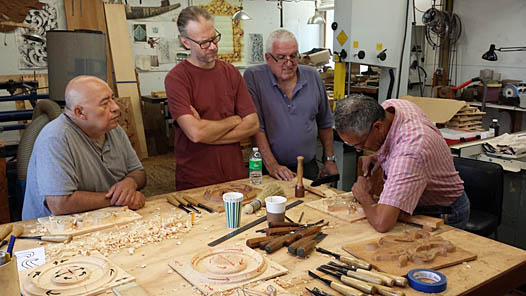
You might be unsure where to start if you are a beginner woodcarver. Here are a few tips for your first animal carving project:
Dog
There are many free wood carving patterns that you can download for your dog if it's an aspiring woodcarver. These patterns will help you to carve your dog in different sizes and styles. These are the tools that you'll need to carve your pet dog. You'll need a bandsaw or coping saw, chisels (or a mallet), and time to sharpen. Next, you will be ready for carving!
Eagle
Native Americans have long held the bald Eagle as a symbol for strength, courage, and knowledge. Its primary purpose was to be the creator's messenger. It measures approximately 20 inches in size and 5 inches wide. The eagle is still a popular choice for wood carvers. There are many woods that can be used to carve eagles, including modern and antique. This article will show you some of the most common wood carving styles.
Bear
Carving a bear in wood is an easy project. It has several distinguishing lines and shapes. Each line is heavier than the previous. For extra visual interest, the front paws of bears are angled towards the legs to add interest. Consider buying a book to help you learn how to carve a bear if wood carving is new to you. James Miller's book describes the entire process.
Elephant
An elephant wood carver is a beautiful way to give your home character. 1stDibs stocks 56 antique carved wood elephants as a well as two new pieces. These pieces were made as early as the 19th-century and have grown in popularity over recent years. You can choose from Art Deco, Mid-Century Modern, and Folk Art styles, or you can select a smaller piece to add a subtle touch to your home decor.
Moose
A moose is a wonderful animal to wood carve, whether you are looking to add antlers and/or create a stunning moose head. Dowels can be used to attach moose paddles and antlers. You'll need to push them in and possibly glue them in place. Then you can paint or color the moose with a walnut gel stains.
Moose template
Carvers can use a moose carving template to help them create realistic-looking carvings. You can color moose carvings with paints or stained them with walnut gel stain. It is not difficult to carve this animal once you learn the basics. You can add details like fur or eyes with a brush, or a typhoon piece on a diegrinder. For beginners wood carvers looking to carve an animal, the Moose template will work well.
Bear template
To start carving bear wood, you will need a template. Use a Dremel Tool to inspect the wood features. With this tool, you can use stop cuts to separate the legs from the lower body. You can also make small V-cuts in the legs to indicate where they will split. Round the underbelly once you've completed the leg and ear pieces. To continue shaping the bear, leave a space at the back.
Eagle template
To carve an eagle, you will need three detailed templates. One template will be used to carve the eagle. The other template will be used for working on paper and can then be cut to make patterns. The third template will serve as a reference. Next, you'll use the tools provided to cut out main lines. Make sure that you cut out the lines as close to the pattern line as possible. Make sure that you align all of your marks.
Template for the mouse
If you're new to wood carving, you'll find that there are several different designs to choose from. A template can make it easier and you can even find printable patterns to help you. A simple geometric pattern is a good starting point if you're just beginning. Then you can move onto more complicated patterns as you progress. Once you know the basics, the rest will come easy.
FAQ
Is it necessary to be a genius in woodworking to succeed?
No. Woodworking is not difficult. To create stunning works of art, anyone can learn to use basic power tools.
How long does it take to finish a piece of furniture?
It depends on the type of wood you choose, the complexity of the design, and the amount of finishing you apply. Hardwoods are more difficult to maintain than softwoods. Hardwoods are also more expensive than softwoods. However, they are stronger and more resistant to moisture. Finishing furniture can take anywhere from one week up to three months.
Which woods are good to use for furniture-making?
Woods can be classified according to how hard they are. Softwoods include cedar and pine as well as cedar and cedar. Because they are resistant, they can be used for outdoor furniture. Hardwoods include oak, maple, mahogany, and teak. They are generally indoors as they don't weather well outside.
What tools should you start with to become a woodworker
Woodworking is an art that takes patience and practice. It takes time for you to master the different techniques and tools that are required to woodwork.
There are many different types of woodworking equipment available on the market today. Some prefer to use power tools and others prefer hand tools.
The choice is yours, but you must ensure you choose the right tool for the job. Start with a basic set if you don’t have any previous experience.
You might also want to learn how a router works, which allows you to cut wood into intricate shapes. These can be found at most hardware shops.
Statistics
- The U.S. Bureau of Labor Statistics (BLS) estimates that the number of jobs for woodworkers will decline by 4% between 2019 and 2029. (indeed.com)
- Overall employment of woodworkers is projected to grow 8 percent from 2020 to 2030, about as fast as the average for all occupations. (bls.gov)
- If your lumber isn't as dry as you would like when you purchase it (over 22% in Glen Huey's opinion…probably over 10-15% in my opinion), then it's a good idea to let it acclimate to your workshop for a couple of weeks. (woodandshop.com)
- Woodworkers on the lower end of that spectrum, the bottom 10% to be exact, make roughly $24,000 a year, while the top 10% makes $108,000. (zippia.com)
External Links
How To
How to make wood joint
This tutorial will help you join two pieces of wooden together. We will use the pocket hole joint, which is drilling holes in the wood to join them. This works well if the wood is straight and smooth. You may want to consider other methods, such as dowel joining. Here are the steps
-
Drill Pocket Hole Joints. To start, measure and mark where you want to put the pocket hole joint. Use a jigsaw or handheld drilling machine to drill 3/8 inch deep holes at the ends of each wood piece.
-
Sand Smooth. Sanding the edges of the wood will help to prevent the joint from splitting later.
-
Glue together. Apply glue to the sides of both wood. Allow it to cool for at least 5 minutes before you attach the pieces.
-
Connect the pieces. After the glue has dried thoroughly, secure the pieces so that they are flush.
-
Trim Joinery. Trim the excess wood around the joint after the glue has dried completely.
Make sure to leave enough room between the pieces so that you can turn them inside and out.