
You can find a variety of patterns for a scroll saw on the internet, including many holiday ones. These patterns can be used for making Santa mobiles, a basket, or even a nightlight! Just download one to get started! Then, browse the many other patterns available to find the perfect one for you! Scroll saws can be fun and versatile. Why not try different patterns to make something unique with them?
Scroll saw and simple pattern projects
An essential skill for any scroll saw owner is the ability to create patterns. There are many types of patterns, including those that have been adapted from papercraft, quilting and stenciling. You can create patterns using high-contrast images to look hand-drawn. These tutorials and guides will show you how to use your Scroll Saw. Many of these patterns can also be found in woodworking magazines.
Simple Pattern Projects with Scroll Saws is a great resource. It contains 28 projects, as well instructions for selecting the correct wood and other supplies. It also has a section for introducing your own designs. Although it is tempting to just stick to the patterns already in existence, there are still many ways you can start with your scroll saw. For example, you can make a wooden heart, a bird, or a dog silhouette.
A scroll saw is used to create a Santa Mobile
This Christmas tree-shaped scrollsaw mobile project is fun and requires basic scroll saw skills. To match Santa Claus's red Santa Claus, the first step is to cut two stars. Once you have cut these pieces, you can make Santa mobiles by making holes in one side and a point on the other. The pieces can be connected using coiled wire and hung by hanging the mobile.
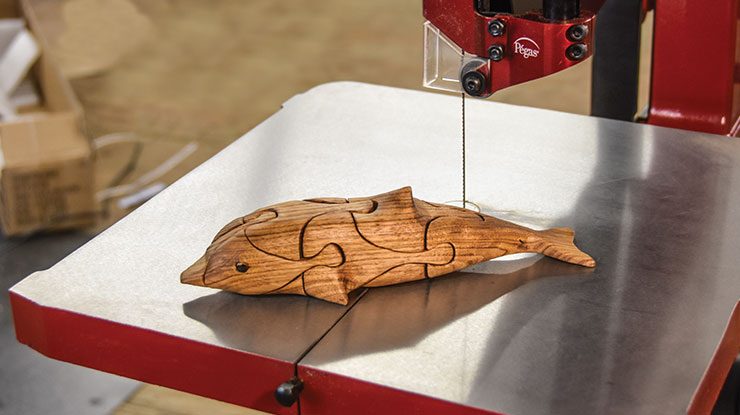
Scroll saw patterns are also available for download. They range from simple two-piece designs, to more complex 3D patterns. You can find many scroll saw patterns online, some of which are printable. Next, select a pattern that interests you and start! The possibilities are endless. You can make a Santa Mobile with a scroll saw. It's a great way for holiday preparation. It is possible to cut several pieces and stack them in order to sell them.
Making a basket from a scroll saw
Making a basket using a scroll saw is a great way to learn woodworking. With basic woodworking skills and a few basic tools you can easily make beautiful baskets in no time. It's easy to make a beautiful basket with our full-size scroll saw template. The best part? In no time, you'll be able assemble your new creation.
This book covers all aspects of creating a functional, beautiful basket. To make baskets you'll need to have a scrollsaw. This book will teach you how to do that. The book is divided in four sections: the base and the rings, as well as the handle. For each ring you'll need four 1/16” (2mm) bits as well as a #3 MG blade.
A scroll saw creates a nightlight
A scroll saw can be used to create stunning nightlights. There are many patterns that you can use to make a nightlight using a scroll saw. These projects are very easy to make and can be used to show off your sawing skills. You can create a nightlight by using a scrollsaw. Here are some simple steps.

Scroll saws are great for creating intricate curves and forms. The scroll saw's vertical blade can be swiveled to create curved cuts. Scroll saws can be found in various sizes, many are portable and have advanced engineering. A scroll saw that reduces vibrations can be found with a patented technology that allows you use it without needing a heavy desk. Many scroll saws have blade and attachment locks that are secure.
FAQ
How long does a piece take to finish?
It all depends on what type of wood you use, how complex your design is, and how much finishing you use. Hardwoods require more care than softwoods. Hardwoods tend to be more expensive that softwoods. But they last longer, and resist moisture better. The process of finishing a piece of furniture typically takes anywhere from one week to three months.
How often should I buy new supplies?
You will likely need to replace some tools over time. You'll need to sharpen your hand tools regularly if you use them. If you are using power tools, you will need to purchase replacement parts regularly. Spread your purchases over several months to avoid purchasing too many items at once.
Are you a genius in order to master woodworking?
No. Woodworking is not difficult. To create stunning works of art, anyone can learn to use basic power tools.
What material would your recommendation be to learn woodworking?
Start with softwoods, such as pine or poplar. Once you feel comfortable with these two, move on to hardwood.
How do I calculate woodworking prices
The most important thing to remember when calculating costs for any project is to keep them as low as possible. You should always try to make sure that you are getting the best deal on materials. You should also consider other factors that could impact the cost of your project, such as experience, skill level, time, and money. You can find an estimate of the cost of different woodwork projects in our guide to common DIY tasks.
Statistics
- The best-paid 10 percent make $76,000, while the lowest-paid 10 percent make $34,000. (zippia.com)
- In 2014, there were just over 237,000 jobs for all woodworkers, with other wood product manufacturing employing 23 percent; wood kitchen cabinets and countertop manufacturing employing 21 percent. (theartcareerproject.com)
- If your lumber isn't as dry as you would like when you purchase it (over 22% in Glen Huey's opinion…probably over 10-15% in my opinion), then it's a good idea to let it acclimate to your workshop for a couple of weeks. (woodandshop.com)
- Average lumber prices rose about 600 percent between April 2020 and May 2021. (familyhandyman.com)
External Links
How To
Tips for driving a nail in wood
When driving a nail into wood, it is important to first choose the correct size and kind of hammer. The most commonly used types of Hammers are claw hammers. Each type has its strengths and weaknesses. For example, a claw hammer works best when you want to hit something hard, like nails; however, it's difficult to control precisely where the blow lands. A sledgehammer is useful for striking large areas at once but too heavy to be effective for smaller tasks.
After selecting the right hammer, you will need to place your hand flat against one side of the head. The handle should rest comfortably in your hands. Take the handle and hold it with both hands. But don't press down so hard you injure yourself. Hold the hammer straight up, keeping your wrist relaxed. Swing the hammer back towards the ground, with your aim at the middle of the nail. You should feel the impact on the nail from the hammer. Practice swinging your hammer on a block of wooden until you feel comfortable.
When you're ready to start driving the nail, hold the hammer in front of you close to your body. Place the nail so that it is perpendicular with the wood's surface. Keep your eyes focused directly on the tip of the nail. Swing the hammer forward, and then move the hammerhead. Repeat this action several times, gradually increasing the speed of the swing. Try adding power to your swings when you've mastered the technique. To make it more powerful, hold the hammer up high to your shoulder and then bring it down. This will help you put more energy behind each of your moves.
Once you have made the first hole, remove your hammer. To pull out the remaining nails, use a screwdriver or pry bar. Keep the nail heads parallel to the board's surfaces in order to avoid splitting wood.