
Before you begin cutting picture frame pattern, it is important to understand the basics of a Scroll Saw. This article will explain how to use your scrollsaw to cut patterns. This article will also discuss how to make picture frame using scroll saw pattern. You should get a scrollsaw if you don't have one yet. But before you buy one, make sure that it fits the size of your saw.
Basics of a scroll saw
Scroll saws make beautiful picture frames and holders. There are two types main scroll saw projects. These are wall hangings and tabletop, flat displays. For both types of projects, you'll need to cut multiple pieces of wood with different sizes and shapes. For a 3D scrollsaw design, you will need to cut multiple layers to give it three-dimensionality.
Before you start cutting, make sure you find a scrollsaw pattern that suits your skill level. You can find thousands upon thousands of free patterns online. Many patterns are appropriate for beginners. Others are more difficult. Most of these patterns are simple to follow so you'll be able to find one that suits your needs. Finish your frame by applying wood varnish or lemon oil. This will help protect it from future damage.
Another simple scroll saw project, a self-contained Noah's Ark puzzle. This pattern is also available in printable format. It's a great way for you to try your skills. If you prefer a puzzle, there is a variety of printable patterns available. If you're not comfortable working with a scroll saw yet, you can always try making a freestanding VW Beetle puzzle. It's not only decorative; it's also great for mental training! A professional scroll saw pattern or DIY tutorial are both great options if you're looking for an easy project that doesn't require a lot of time.
Basics of cutting patterns using a scroll saw
You might want to learn how to make wooden picture frames with a scroll saw if you are interested in learning the techniques. Patrick Spielman's book has lots of great new designs you can try. This book contains over thirty patterns and uses a different scrolling technique than other books. This book will teach you how to size, copy, and transfer patterns.
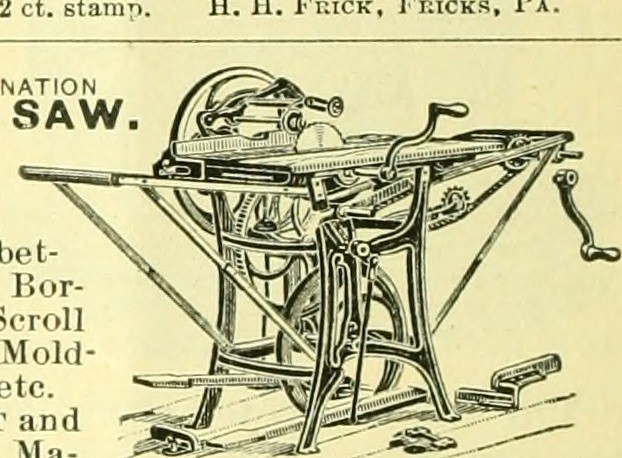
A scroll saw is a great tool for creating picture frame patterns. This technique is used to create many of the most well-known picture frame patterns. This allows for more precision as the pieces can be nested together after being cut. You can double bevel by tilting the table while you work. This type of marquetry, also called "artistic woodworking," is great for people who are just starting out in the craft.
Scroll saws can be purchased online for as low as $40 Scroll saws can be found in basic models that are only a few decades old but still in great condition. Online purchasing a scroll saw is a cost-effective way to learn how cut picture frames. There are a variety of websites where you can purchase used scroll saws. These websites have a variety of models and prices for those who aren't on a tight budget.
How to make picture frames using a scrollsaw
Making picture frames with a scrollsaw can be complicated and requires knowledge. The book covers basic scrolling techniques and provides examples of different styles of picture frames. All picture frames are composed of two main boards. There is one main board that has an opening for the picture and another smaller face frame that glues on top to hold it. Despite all the steps involved, the book is an excellent guide.

This book is filled with project ideas to help beginners learn how to use a scroll saw. The book features 32 designs that you can make with the scroll saw. Each frame design has many variations. The book is more than a pattern book. Because there are no exact copies of any picture frames, it can be used in many different ways. Below are some examples of techniques that you could use. Once you're familiar with these scrolling techniques, you can experiment to find the perfect one for your picture frames project.
FAQ
How do you calculate woodworking prices?
Remember to keep costs as low as you can when calculating project costs. You should always try to make sure that you are getting the best deal on materials. You should also consider other factors that could impact the cost of your project, such as experience, skill level, time, and money. Check out our guide on the average cost of common DIY projects to get an idea of how much you can spend on woodwork projects.
How can I learn basic woodworking skills
You can start building furniture by making a bench. You can use any wood you have in your home to complete this project. If you aren't sure what type of wood to use, you can buy cheap pine boards from Lowes or Home Depot. After building your bench, sand off any rough edges and apply a stain or varnish.
What wooden items do you sell well?
These wooden products are the most popular. They were made from sustainably harvested wood.
The most used wood types for furniture are oak, maple and walnut.
These woods have beautiful grain patterns and colors. They are also very strong. If they are well cared for, they can last many years.
To protect wooden furniture from moisture damage, you should paint it first. All surfaces should be painted, including doors, drawers, and handles.
Choose a paint with water resistance if you want furniture to last as long possible.
It is recommended to use an oil-based primer, then apply two coats. It is possible to apply multiple coats depending on how heavy the wear.
Spray cans and aerosol spray paints are not recommended. These products contain solvents which evaporate quickly and leave behind harmful fumes.
Statistics
- The U.S. Bureau of Labor Statistics (BLS) estimates that the number of jobs for woodworkers will decline by 4% between 2019 and 2029. (indeed.com)
- Overall employment of woodworkers is projected to grow 8 percent from 2020 to 2030, about as fast as the average for all occupations. (bls.gov)
- Woodworkers on the lower end of that spectrum, the bottom 10% to be exact, make roughly $24,000 a year, while the top 10% makes $108,000. (zippia.com)
- In 2014, there were just over 237,000 jobs for all woodworkers, with other wood product manufacturing employing 23 percent; wood kitchen cabinets and countertop manufacturing employing 21 percent. (theartcareerproject.com)
External Links
How To
How to stain wood
The process of staining wood involves the application of chemicals to the wood's surface, which causes it to change its color. This chemical reaction causes the wood color to change from white and brownish red. The most common type of wood used for staining is oak, although many other types of wood can be stained.
You can apply wood stains in many different ways. One method involves mixing the stain and a solvent and then spraying it on the wood. Other methods use a solution of water and dye applied directly to the wood. You can also mix stains with varnishes or paints so that they become part the finish coating.
The first step in staining wood is preparing the surface. The wood must be thoroughly cleaned to remove all grease and dirt. Sanding smoothens any scratches or rough spots. The next step is to determine the type of stain you would like to use. There are two main types of stain: non-penetrating and penetrating. Penetrating stain penetrates deeper into wood than nonpenetrating, making them suitable for dark colors like mahogany. Non-penetrating stains work best with light colors like maple.
After deciding on the type of stain, you want to apply, prepare your tools. A paintbrush works well for applying stains because it allows you to spread the liquid evenly across the surface. To remove any stains left behind after painting, you will need some rags. If you plan on mixing the stain yourself make sure that you have enough containers to hold the different components.
After you have prepared the materials, you can clean the area where you want to stain the wood. You can remove grime and dirt with warm water and soap. Use a dampened rag and clean water to wipe the furniture. If you intend to stain darker wood, make sure you get rid of any debris.
Apply the stain. Begin at one end and spray or brush the stain on the wood. Work slowly and carefully, moving back and forth along the grain of the wood until you reach the opposite end. You must be careful not to allow the stain to drip off the wood's edges. Let the stain dry completely before proceeding with the next steps.
Apply a clear polyurethane sealant to protect the painted surface. Apply three coats polyurethane sealer. Let the third coat dry overnight before you sand the final coat.